 EcorisMap
CHAPTER 11
Creating a Viewshed
EcorisMap can calculate the area visible from a given point (the viewshed) from elevation data and draw it on the map. It is useful for checking the line of sight from a raptor observation point, or for choosing survey and observation locations. The viewshed is a temporary display — it is not saved as a layer or data.
How to create one
- Long-press the spot on the map you want to use as the observer point.
- Tap “Create Viewshed” in the popup.
- Enter the distance and the observer height in the “Create Viewshed” dialog, then tap “OK”.
- When the calculation finishes, the viewshed appears on the map and a banner with the count is shown at the top of the screen.
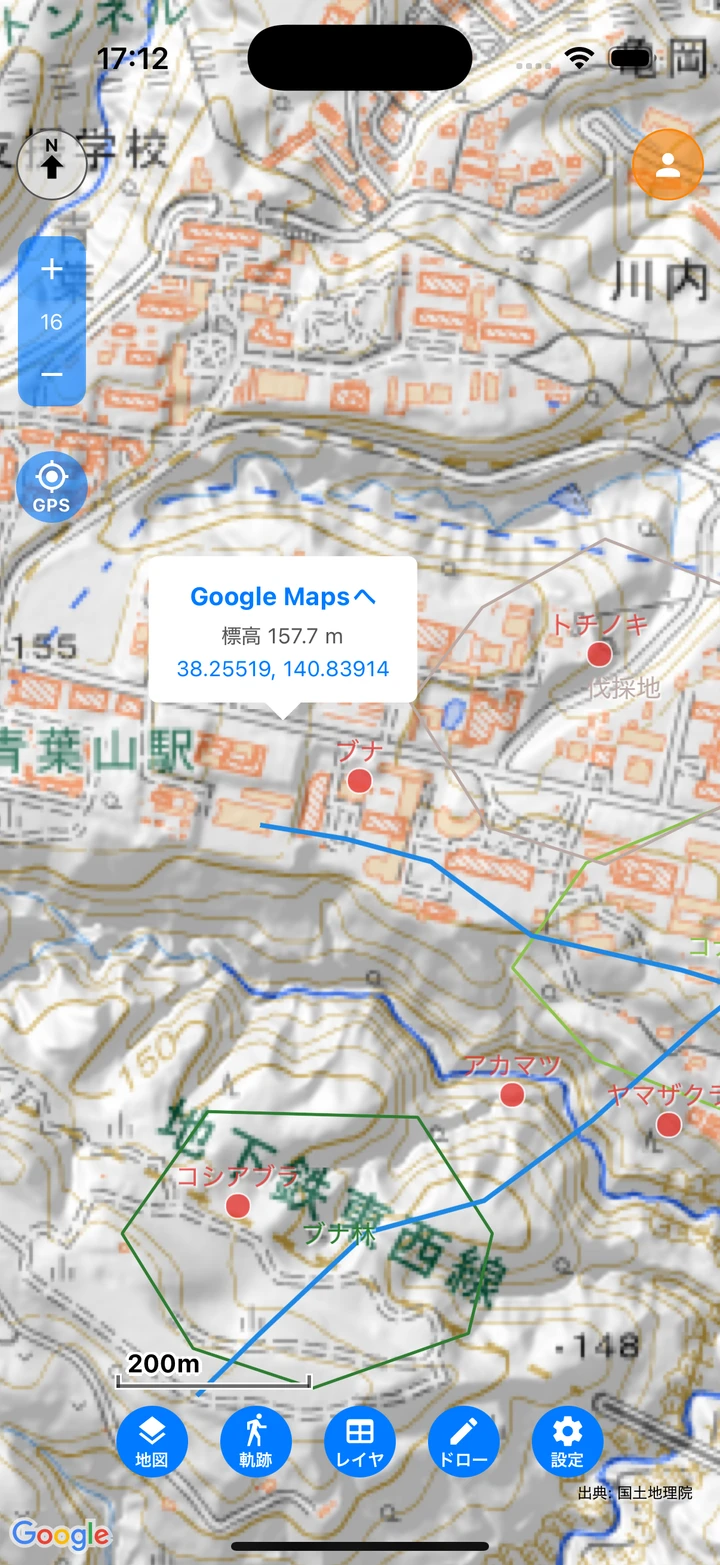
The calculation runs on your device, so a larger distance takes longer (a 10 km radius loads about 120 elevation tiles). A loading indicator is shown while it runs — wait until it finishes.
Dialog items
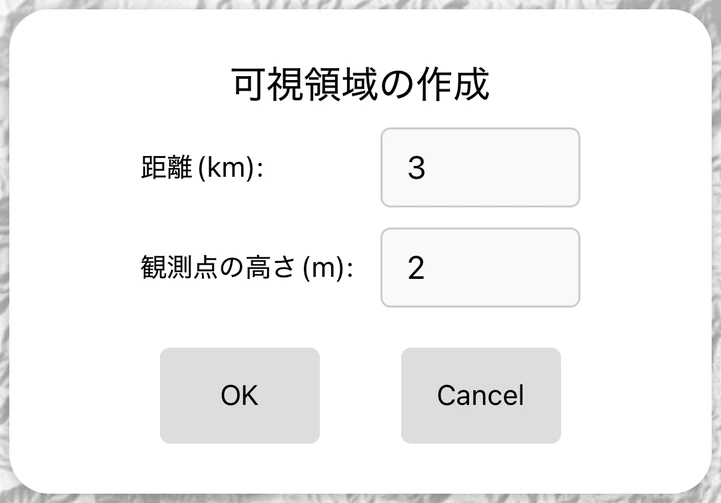
- Distance (km) — The radius from the observer point. Enter a value between 0.1 and 100 km (default 3 km). Beyond 10 km, the resolution of the elevation data becomes coarser with distance.
- Observer height (m) — The height of the viewpoint above the ground. Enter a value between 0 and 1000 m (default 2 m). Visibility is calculated from the observer’s ground elevation plus this height.
- Use point ”…” as center — Shown only when a visible point feature is near the spot you long-pressed. Turn it on to use that point’s coordinates as the observer instead of the long-pressed position. Use it when you want to calculate from an existing point such as a fixed observation point or a nest.
How it is displayed
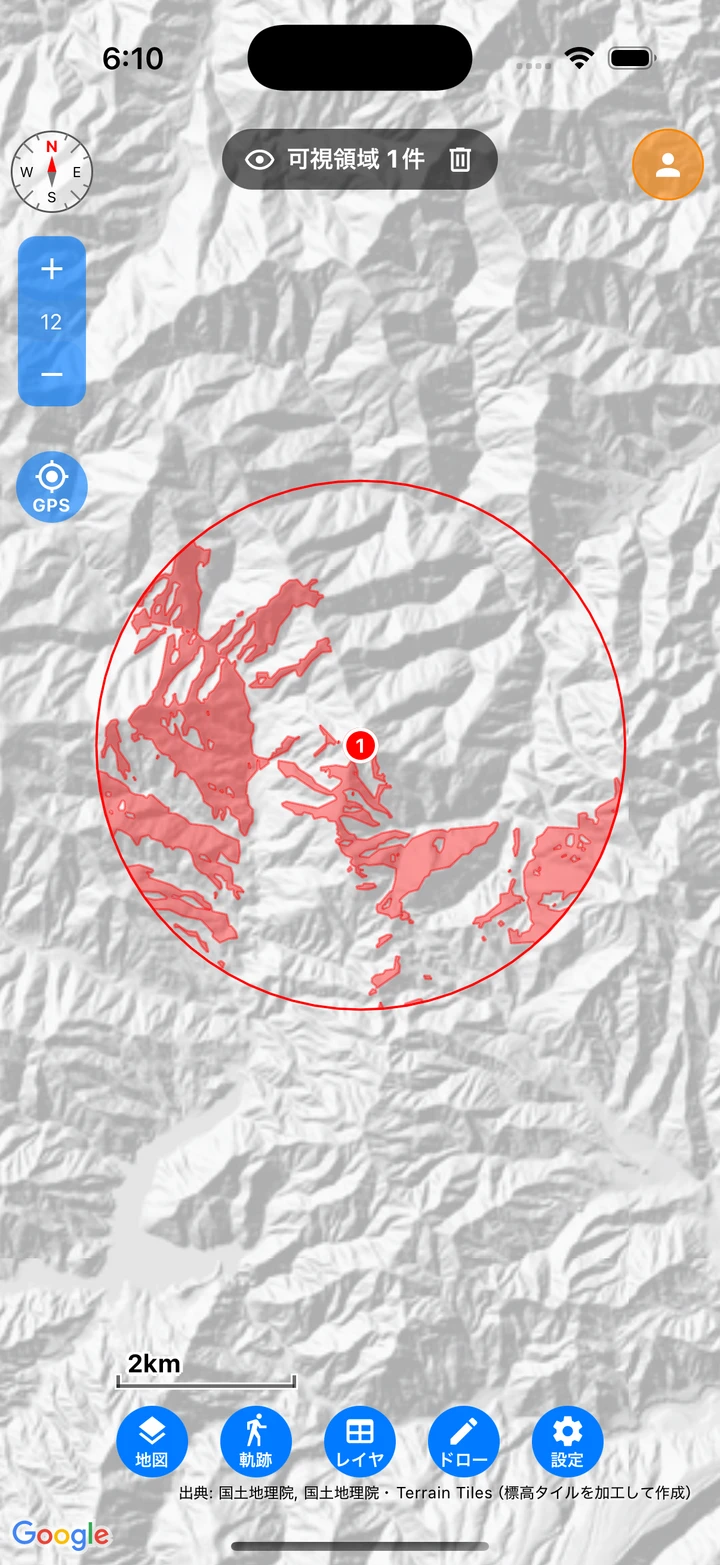
- The visible area is filled in semi-transparent red, together with a circle of the distance you specified and a numbered observer marker. If the visible area is split into separate patches, each is drawn on its own, and areas that are not visible are represented as holes.
- Long-press and create again while a viewshed is displayed to overlay the viewsheds of several observer points. The numbers follow the order of creation — handy for comparing the line of sight from different places or with different settings.
- While viewsheds are displayed, a banner with the count is shown at the top of the screen. Tap the trash button on the banner to clear all displayed viewsheds after a confirmation.
- The viewshed is a temporary display. It stays visible through other operations such as switching maps, but it disappears when you quit the app. To keep the result, take a screenshot.
About the elevation data
- Inside Japan the elevation tiles of the Geospatial Information Authority of Japan (DEM10B, about a 10 m mesh) are used; where the area extends outside Japan, it automatically falls back tile by tile to AWS Terrain Tiles (global coverage).
- An internet connection is required to fetch the elevation tiles. Tiles that have been loaded are cached on the device, so recalculating with a different distance or height is faster. If some tiles cannot be fetched because of a network error, creation is cancelled so that an inaccurate result is not displayed.
- To create viewsheds where there is no signal, download “Elevation tiles (for viewshed)” in download mode beforehand (mobile only; see Download Maps for Offline Use). Within the downloaded area you can create viewsheds offline.
- The calculation corrects for the curvature of the earth and for atmospheric refraction.
- The elevation data is the height of the ground surface. The height of trees and buildings is not taken into account, so treat the result as a guide.
- Where no elevation is available, such as at sea, “Failed to get elevation data” is shown and the viewshed cannot be created.
Note: The popup shown by long-pressing the map also displays the elevation of that spot (see The Home Screen).