 EcorisMap
CHAPTER 08
Record Data
There are two ways to record what you find in the field: draw it on the map, or add it from the data list. Either way, the Data edit screen opens right after you record, so you can enter the attributes.
- Draw on the map — Record by specifying the location on the map. You can create points, lines, polygons, and map memos. See Draw Points, Lines & Polygons.
- Add from the list — Use this to record with the coordinates of your current location, or to record without a location at all. It is available for point and No coordinates layers.
Adding from the list
Tapping a layer name in the Layer list opens that layer’s data list. You can add data to point and No coordinates layers; lines and polygons are created with the draw tools on the map.
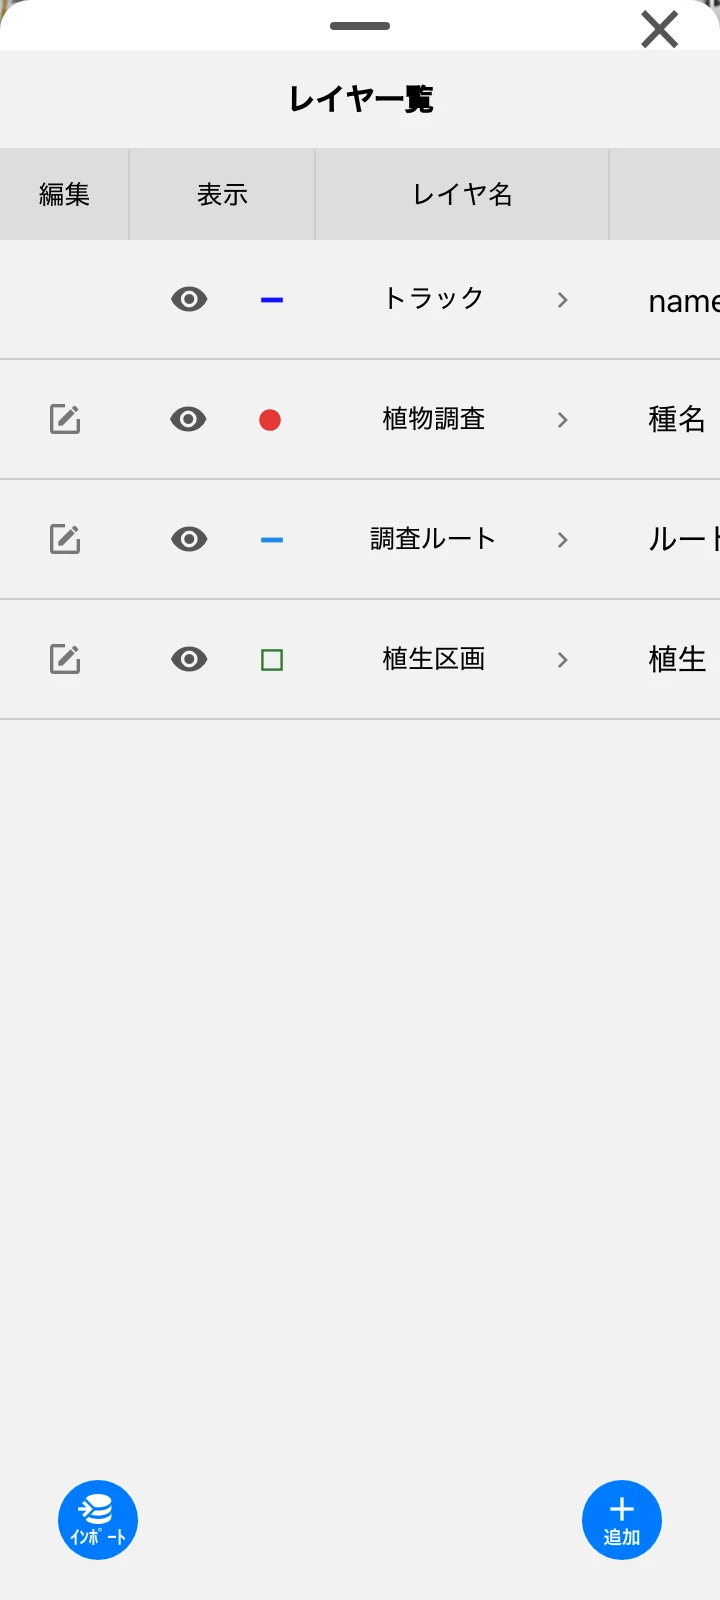 | 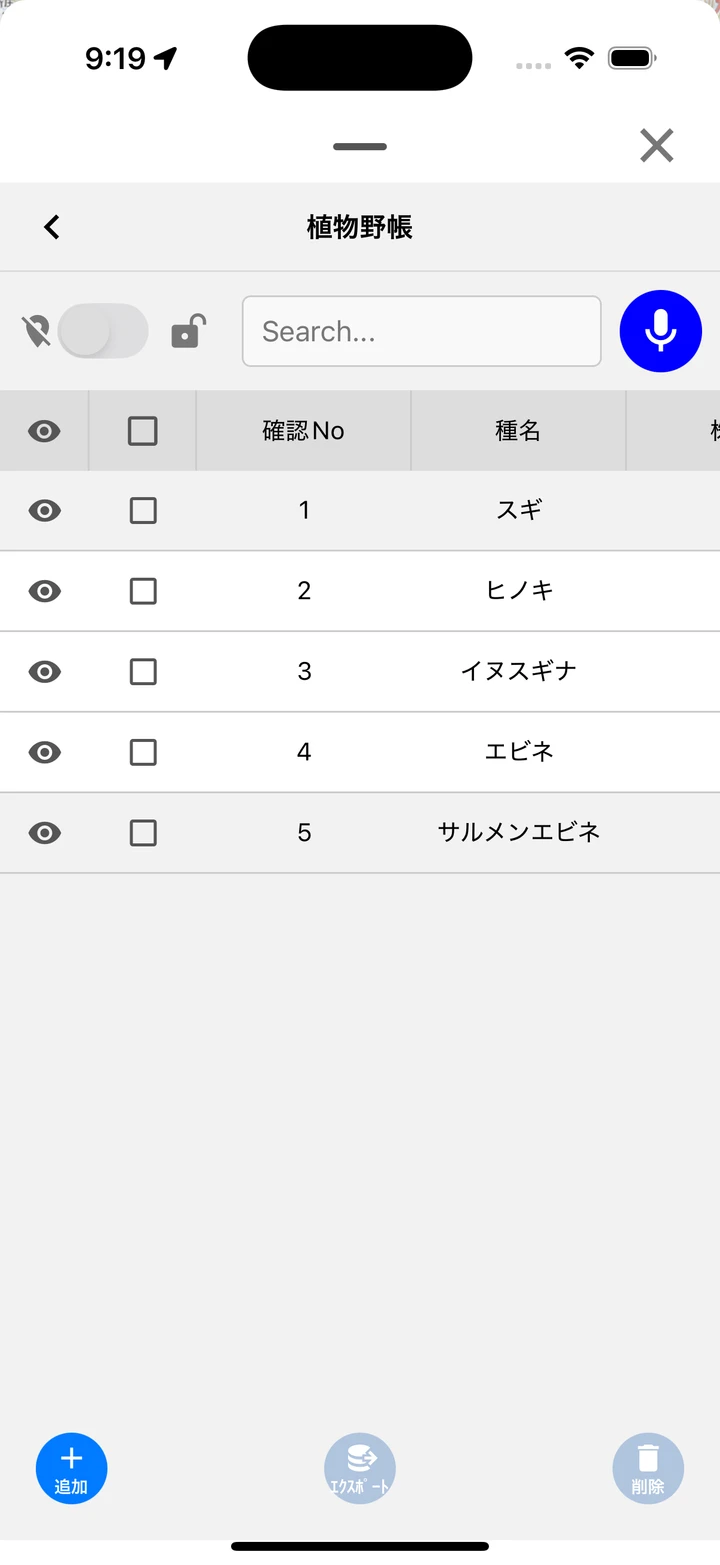 |
Tapping the add button at the bottom creates new data and opens the Data edit screen.
Adding from dictionary candidates
When the layer has a dictionary or dynamic-dictionary field set to “Used to add data”, an input box appears at the top of the list. Choosing a candidate immediately adds new data with that value set, which is handy for surveys where you record the same items many times. For a dynamic-dictionary field the candidates are the values you have entered so far, and the ▼ button shows all of them (voice input is not available).
- Location toggle (point layers only) — Toggles whether the coordinates of your current location are attached to the added data. It is off by default and turns itself off again after one record.
- Lock button — Keeps the location toggle on. While it is locked, the toggle does not turn itself off.
Note: The toggle is meant to be pressed right before the data whose location you want to record. Because it turns itself off after one record, you will not accidentally attach a location to the data that follows. When data is added with a location, the Data edit screen opens, so you can go on to fill in the remaining fields such as a count. If GPS is off, no coordinates are attached and the app shows “GPS is off, so the record is added without coordinates.” To record data with locations one after another, keep the toggle on with the lock button. The setting is remembered per layer, and turning the location toggle off by hand also releases the lock. Data added without coordinates can be placed on the map later with the “position” button on the Data edit screen (see Draw Points, Lines & Polygons).
Entering attributes
The Data edit screen opens from a row tap in the list, a feature tap on the map, the “add” button, or right after you draw a feature.
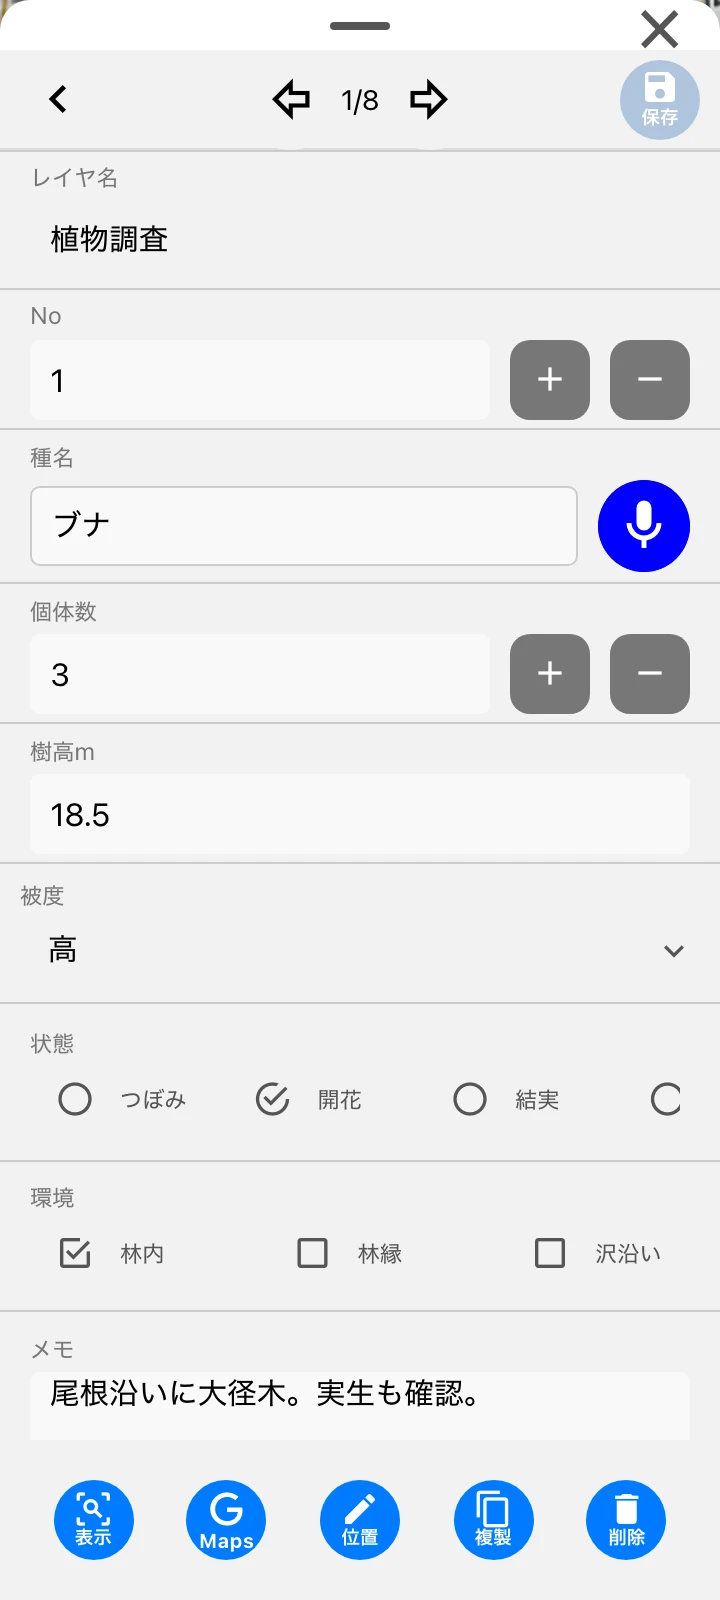 |  | 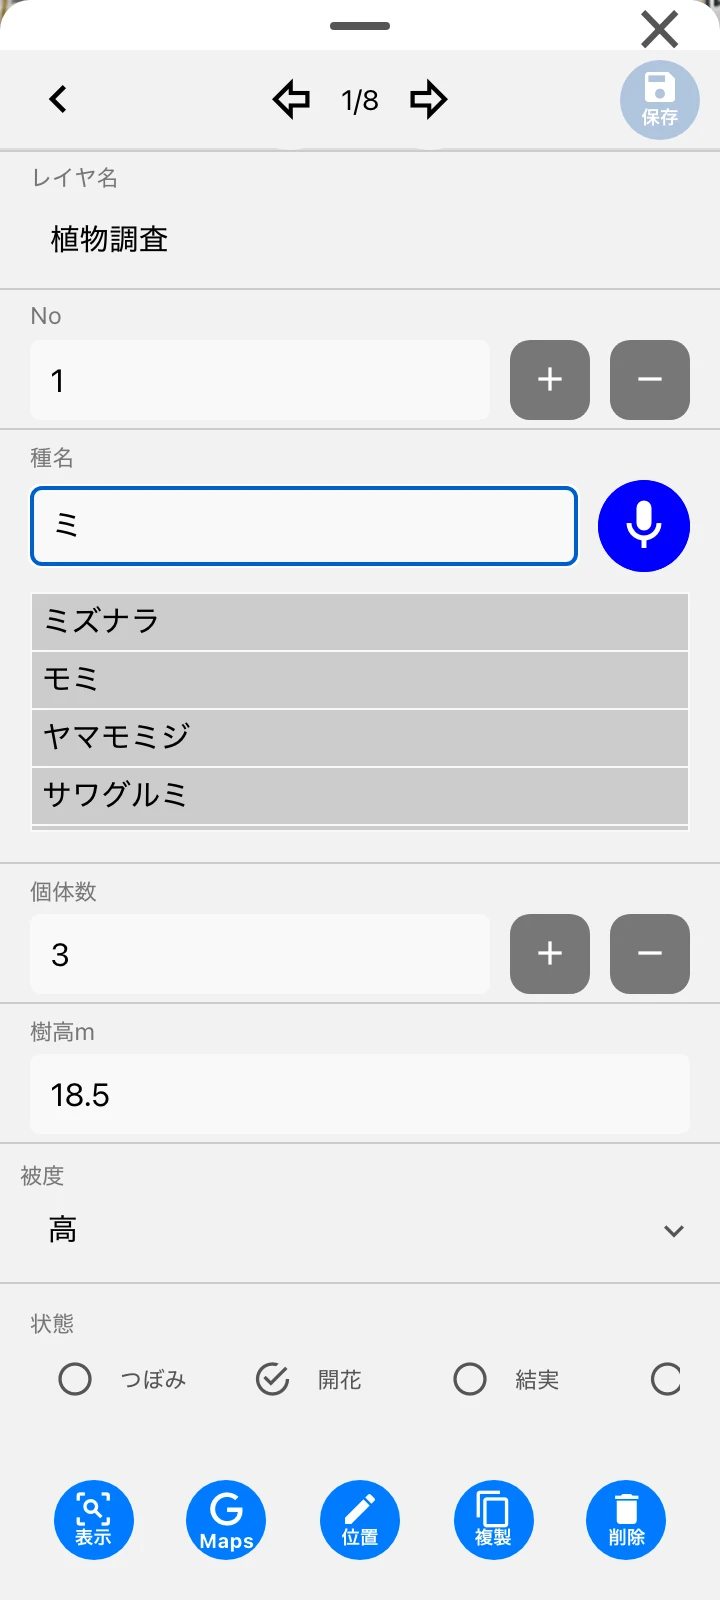 |
- Previous/next navigation (⇦ 1/3 ⇨) — Moves to the previous or next data within the same layer. Trying to move while editing shows a discard confirmation.
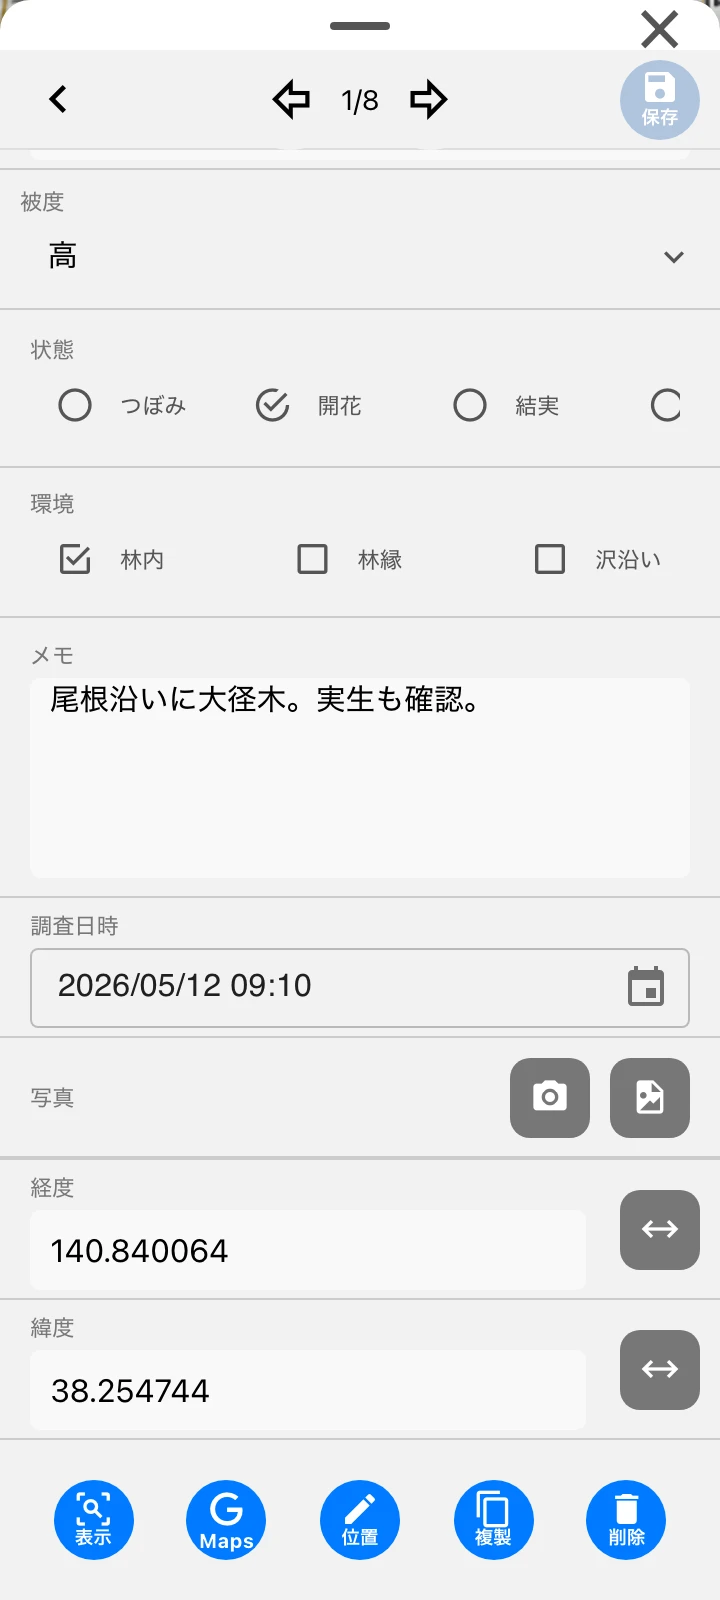
- Fields — Enter values using the input UI appropriate to each data format. A free input box appears when “Other” is selected in a list. Check allows multiple selection, numbers have +/- buttons, and date/time uses a picker.
- Photo — Use “take photo” to capture, or “select photo” (“file”) to attach a photo from your device. Tapping a thumbnail enlarges it, letting you delete it or download it if it is a project cloud photo.
- Coordinates (points only) — You can directly edit the longitude and latitude. Use the arrow button to switch the display between decimal degrees and degrees-minutes-seconds. Saving with the field blank makes the data “No location”.
- jump — Jumps to the data’s location on the map. Lines and polygons fit to their extent.
- Maps — Opens the data’s location in Google Maps for route guidance to the site (see Check Data).
- Position — Enters position edit mode to correct the location on the map. See Draw Tools.
- copy — Duplicates the data after a “Do you want to copy the data?” confirmation.
- delete — Deletes the data.
- save (top right) — Saves your changes. It is active only while editing. After saving, you return to the previous screen (such as the Data list).
Dictionary input and voice input
For “string-dictionary” fields, you can enter data quickly from registered candidates. You can also batch-load those candidates from CSV in Setting values.
- Typing narrows down the candidates. It uses a forward match plus a fuzzy match, and differences between katakana and hiragana are absorbed.
- Tap the microphone button to enter text by voice. This is available on the mobile version only, and the recognition result is converted to a reading and searched.
- “String-dynamic dictionary” automatically adds saved values to the candidates.