 EcorisMap
CHAPTER 07
Use GPS
Show your current location on the map and record the route you walk as a track log. Recorded tracks are saved to the “Track” layer and behave like ordinary lines.
Showing your location and the marker
Use the GPS button to show your current location and toggle map following.
- Off → following — Tapping checks the location permission, shows your current location, and makes the map follow it. The button turns red.
- Releasing following — Dragging the map releases only the following, and the current-location marker stays visible (the button turns light red). Tap again to resume following.
- Turning off — Tapping while following turns GPS off. You cannot turn it off while recording a track; the app shows “Stop recording the track to turn off GPS.”.
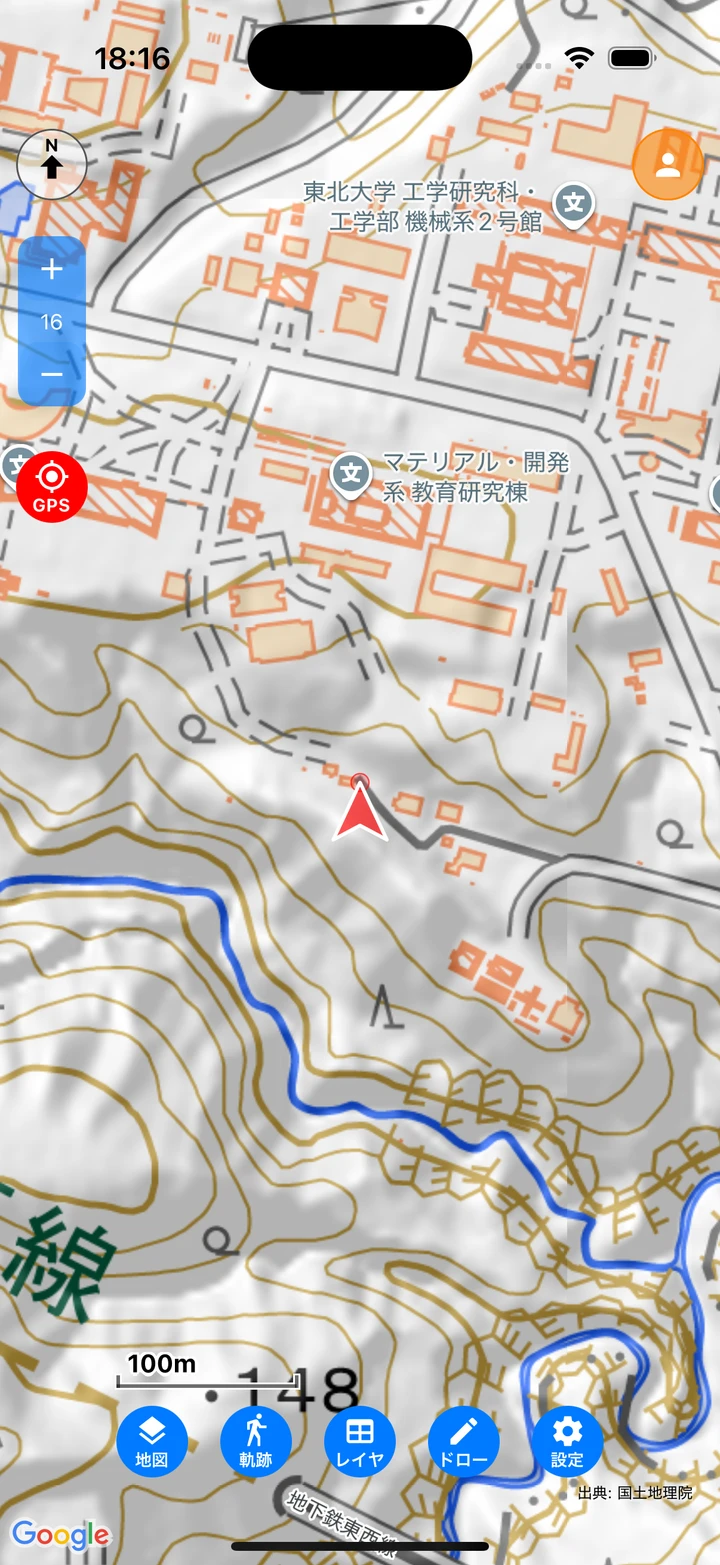
- The marker color indicates GPS accuracy: red = within 15m / orange = 15–30m / gray = over 30m or an old location. Gray means the app is still acquiring satellites and showing a cached position.
- An accuracy circle appears around the marker. The marker rotates to match your direction of travel.
- Long-press the compass button to toggle a straight line (direction line) pointing in the bearing direction. While heading-up, the line stays fixed pointing straight up on the screen; while north-up, it rotates to match the actual bearing.
Track log (recording your path)
Records the route you walk. You can see where you went on the map and look back at passage times and elevation changes later. Photos you took during the survey can also be shown along the track, placed by the time they were taken.
- Starting and stopping — Use the “track” button to start and stop recording. While recording, the button is red and GPS turns on automatically. When you stop, the path is saved to the dedicated “track” layer as a line with timestamps (poor-accuracy locations are excluded automatically). If a previous unsaved track remains, the app asks whether to save it the next time you start.
- Background recording — Recording continues even if you close the app. On Android, it resumes at the next launch even if the app is force-quit; on iOS, it stops if the app is completely terminated.
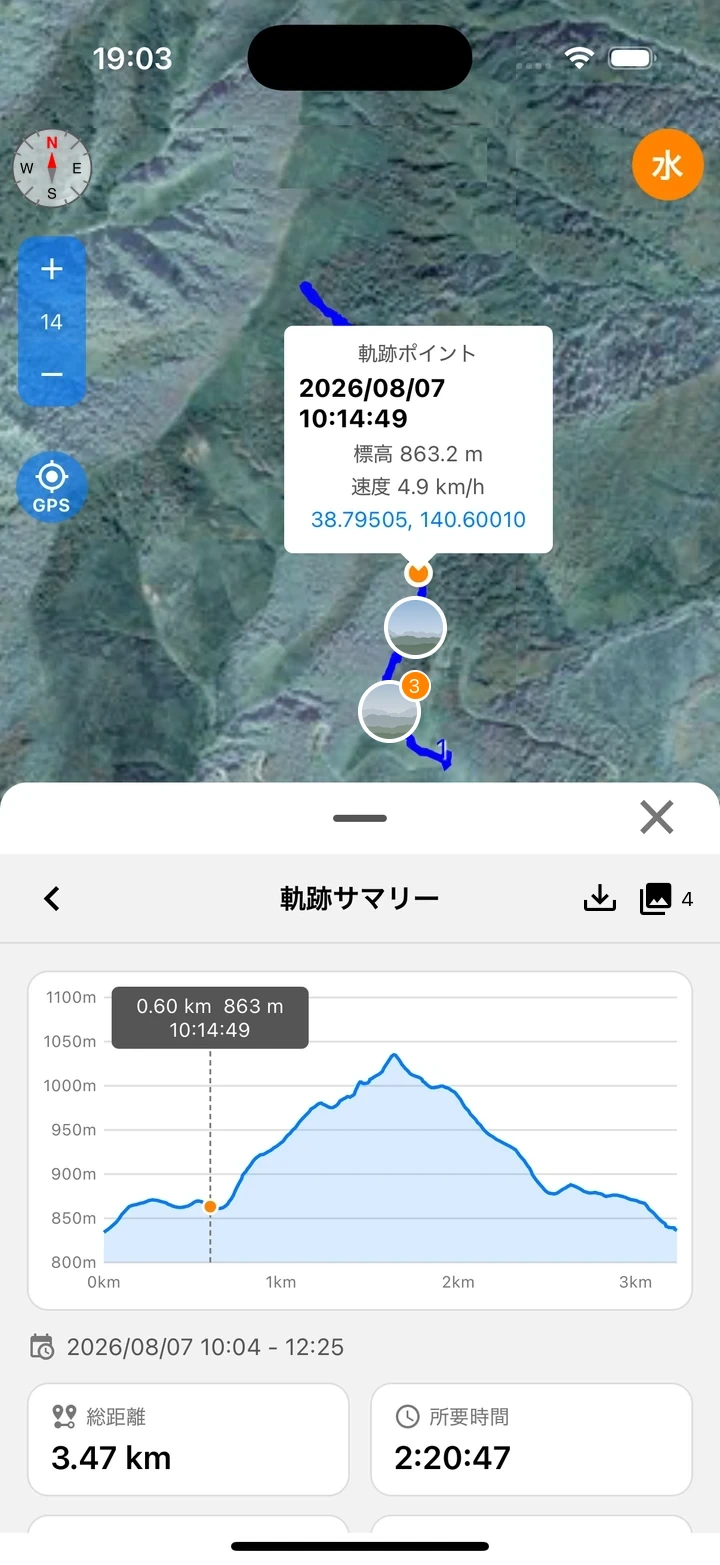
- Summary and passage times — Tap a track on the map to open a popup with the passage time, elevation, speed, and coordinates of that point, and the track summary at the bottom of the screen (an elevation profile plus statistics such as total distance, duration, average and maximum speed, and cumulative ascent/descent). Scrub the profile to show that point on the map.
- Showing photos — The photo icon in the track summary header shows the photos taken during the recording period along the track. Photos are not imported into the app; they are read from the device’s photo library each time they are shown (access to your photos is required the first time).
- Exporting — The export button in the track summary header writes the track and its photos out as a single zip file. You can also export while recording.
The zip contains the following files (photos are included only when the photo display is on).
| File | Contents |
|---|---|
.gpx | The track (trk) and the photo locations (wpt) |
.geojson | The track as a line |
.kmz | For Google Earth. The track and photos in one file |
.svg | A summary image with the statistics and the elevation profile |
_photo.csv / _photo.geojson | The photo locations (time taken, coordinates, file name) |
| Image files | The photos shown along the track |
Note: You can also export the track layer from the data list, but that export does not include the photos or the summary image (see Export Data).
GPS settings
In “GPS settings” on the Settings screen, choose the balance between location accuracy and battery consumption. The setting takes effect the next time GPS starts.
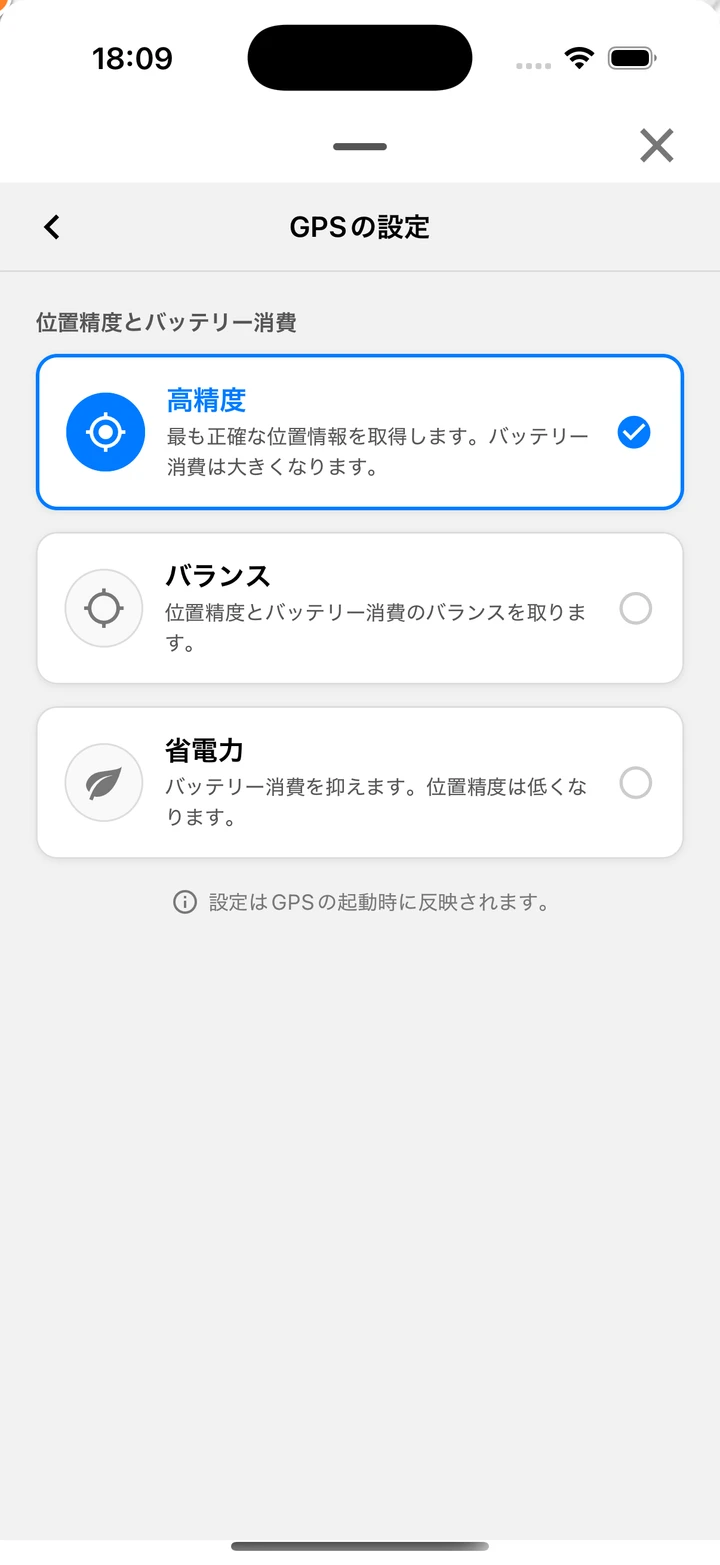
- High accuracy — Obtains the most accurate location. Battery consumption is higher.
- Balanced — Balances location accuracy and battery consumption.
- Battery saver — Reduces battery consumption. Location accuracy is lower.
Proximity Alert
In “Proximity Alert” on the Settings screen, set up alerts for when you approach a registered point. The app notifies you by voice and vibration.
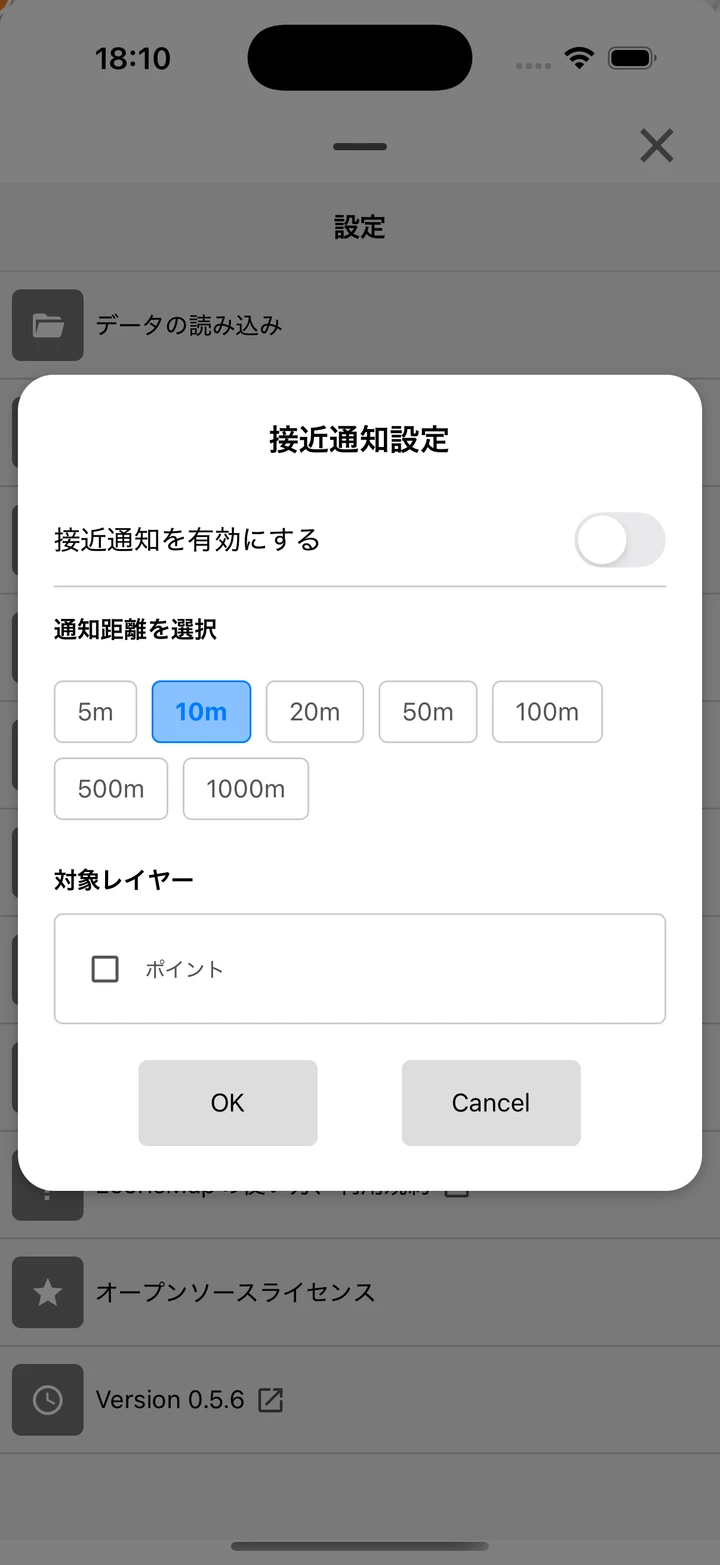
- Enable proximity alert — Turns the feature on or off.
- Select notification distance — Choose from 5 / 10 / 20 / 50 / 100 / 500 / 1000m.
- Target layers — Select the point layers to target (multiple allowed).
- With GPS on or while recording a track, approaching a target point triggers the voice notification “X meters to X” (X is the point’s label). It also works in the background.
- Notifications come at each distance step (1000 → 500 → 100 → … → 5m), and you are notified again if you move away and approach once more. No notification is given when the GPS accuracy is worse than 30m.
Tip: Registering hazards or planned survey points in a point layer helps you avoid overlooking them in the field.
When recording does not work well
Check the location permission
Background track recording requires the “Always allow” location permission.
- iOS — Settings → Privacy & Security → Location Services → EcorisMap → select “Always” and turn on “Precise Location”.
- Android — Settings → Apps → EcorisMap → Permissions → Location → select “Allow all the time”.
Disable battery optimization on Android (if recording stops midway)
On Android, power-saving features may stop background recording.
- Settings → Apps → EcorisMap → Battery → set to “Unrestricted (not optimized)”.
- Devices with manufacturer-specific power saving (auto-start limits, etc.) may need extra settings. See dontkillmyapp.com for per-device instructions.
The current location is off or stays gray
- While the marker is gray, the app is still acquiring satellites and showing an old position provisionally. Wait a while in a place with open sky, and the accuracy improves as the marker turns orange, then red.
- Accuracy drops in valleys, next to tall buildings, and indoors. In track logs, the app excludes low-accuracy points (over 100m) automatically when saving.