 EcorisMap
CHAPTER 19
Project Features
When you sign in with an organization account, your team can run surveys together through a project. An admin prepares a project with the base maps, survey forms, and existing data already set up and shares it with the members; each member simply opens the project and everything appears on their own device. Data recorded in the field is uploaded to the project and shared with the team.
Caution: The project features are not offered as a service at this time; we are working toward offering it in the future. This chapter documents the procedures for reference when using it within an organization. Registering and using an organization account requires approval from the operator.
The project workflow
The admin prepares the project, and members open it and record in the field. Preparation is most comfortable in the web version. The sections below follow the diagram.
Everything you exchange is end-to-end encrypted, so no third party—including the operator—can see its contents.
Preparing the survey (owner/admin)
① Create organization accounts and sign in
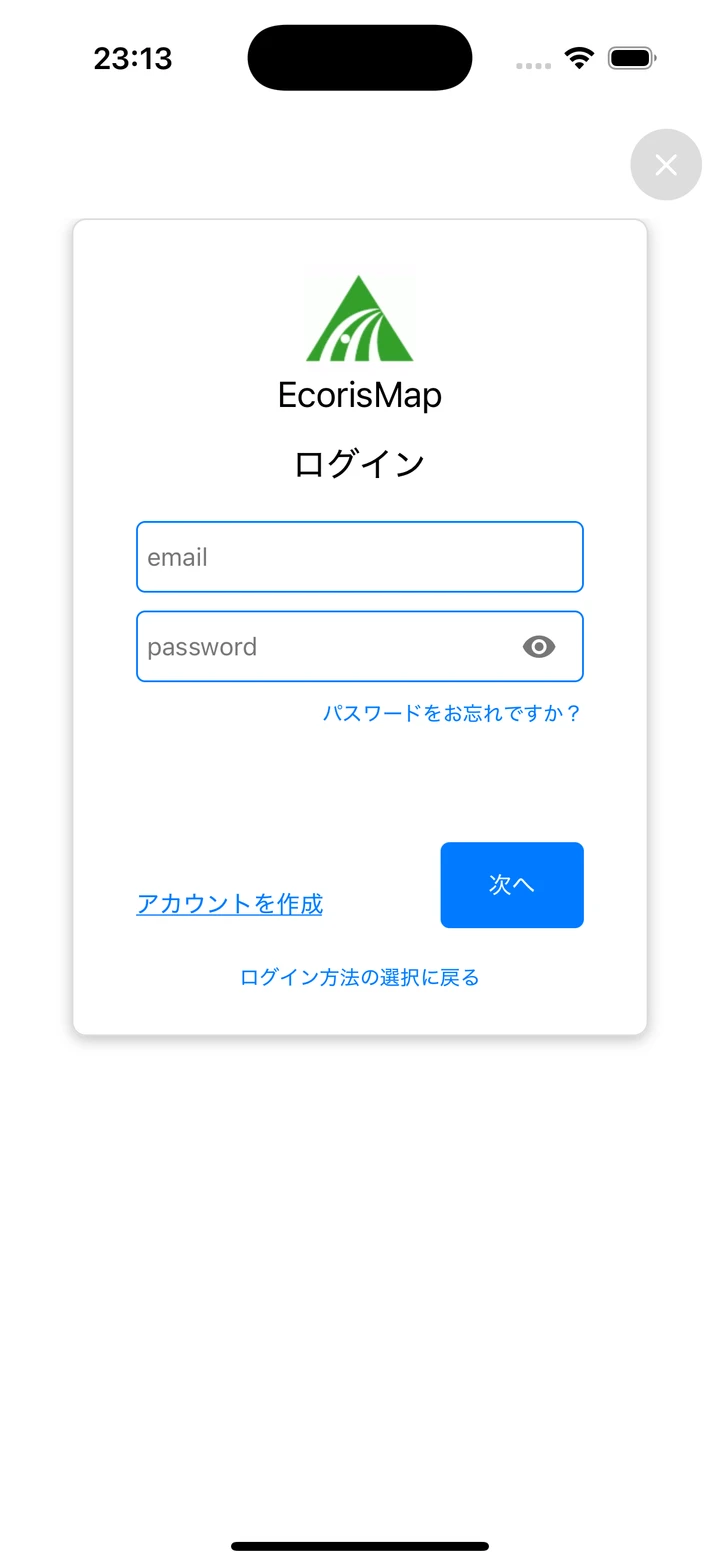
Open the login screen from the account button at the top right of the Home screen, then create an account with “Sign in with an organization account” → “Create an account”. Activate it via the link in the confirmation email, then enter your email address and password to sign in (registration requires approval from the operator).
② Create a project (owner)
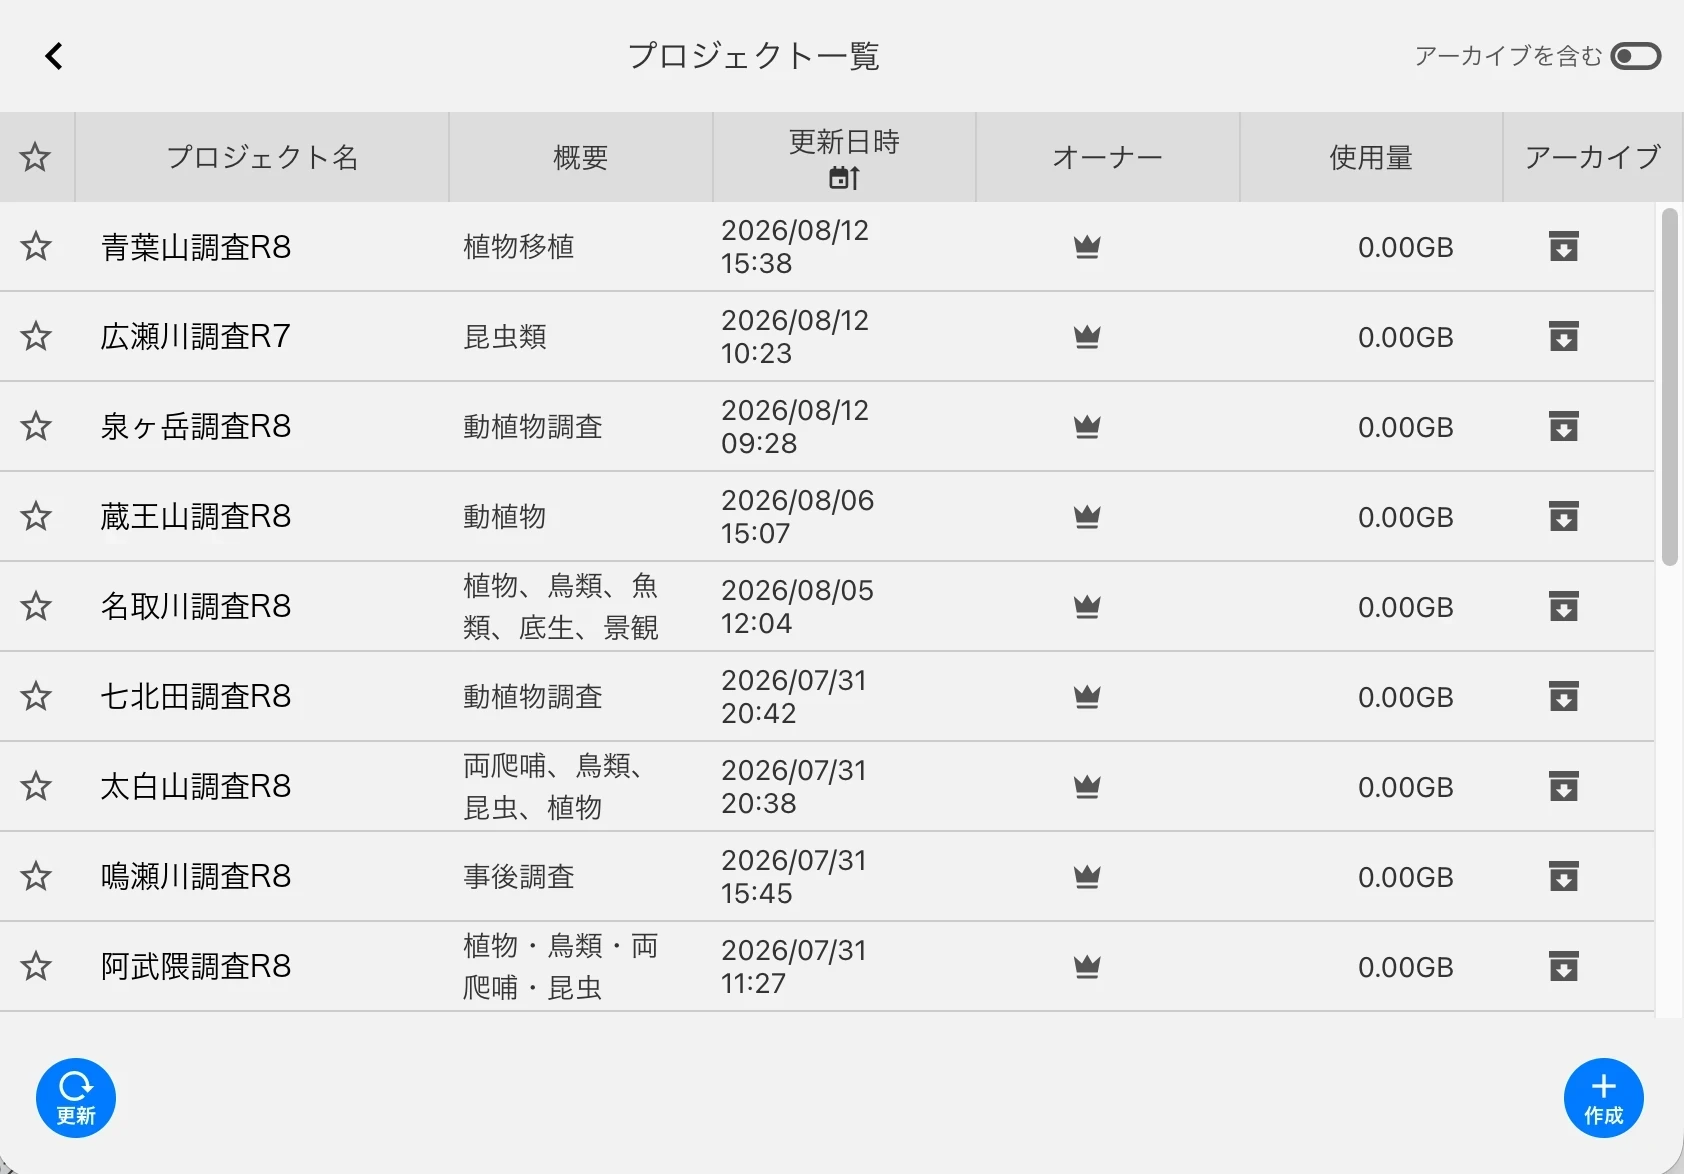
Projects can only be created in the web version. Open the menu with the account button at the top right of the Home screen, open the project list from “Projects”, and make a new project with “Create” at the bottom right. Whoever creates it becomes the project’s owner (one per project) and handles the settings and member management from then on.
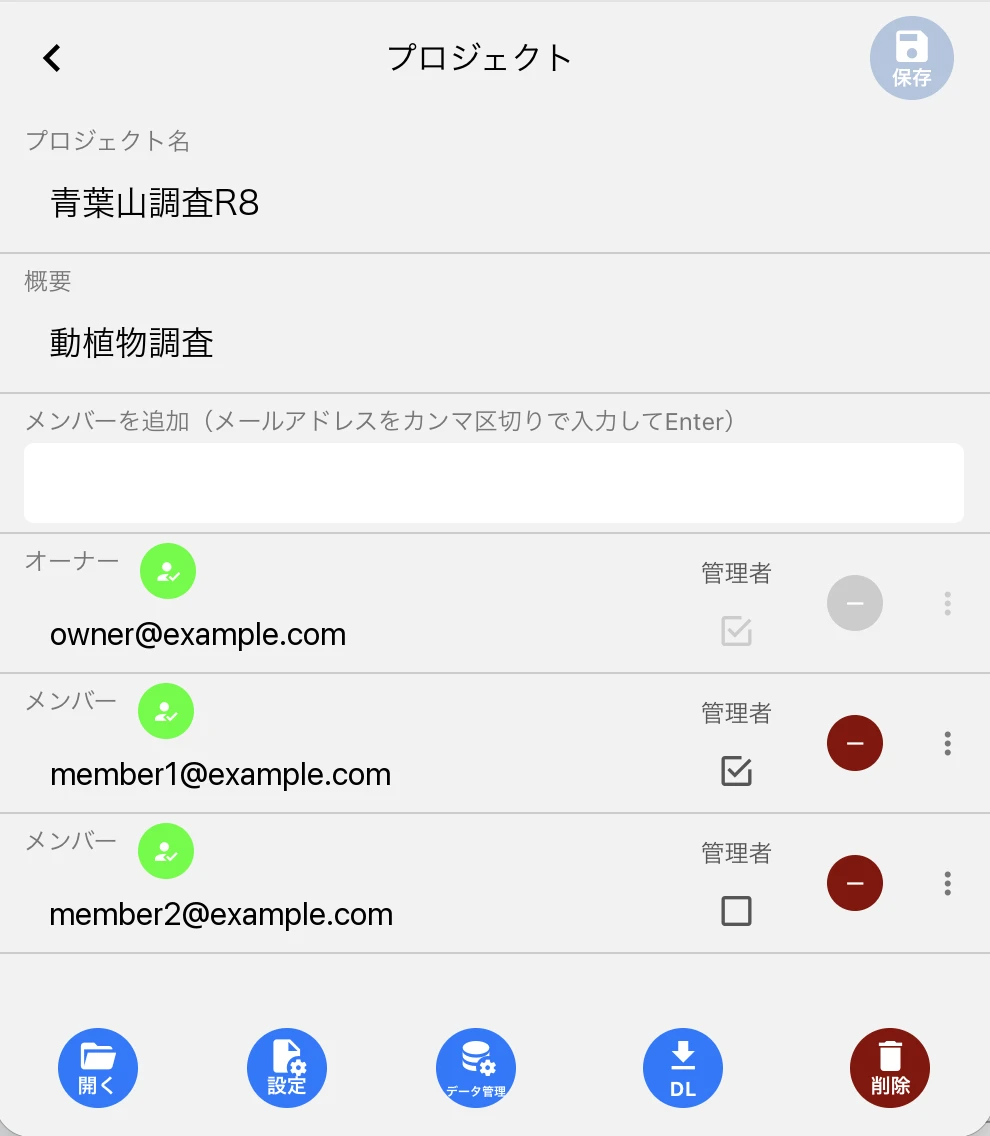
Choosing “Create” opens the project settings screen. Enter the project name and description, and add the first members here if you like. Confirm with “Save” at the top right.
③ Add members
Enter the members’ email addresses in “Add members” on the project settings screen. You can enter several at once, separated by commas or line breaks. Confirm with “Save” at the top right.
People who have not created an organization account yet, and people who have deleted their account, can also be saved as “pending” (you will be asked to confirm). Pending members cannot access the project. Once they have signed up, open the project settings screen again — their status is refreshed — and save once more to activate them. The colored mark next to each email address shows whether the member is active (green), waiting to be saved (orange), or has no account (red).
Admins can add members too, not just the owner, so you can add people whenever they join the survey.
④ Set up maps, survey forms and data
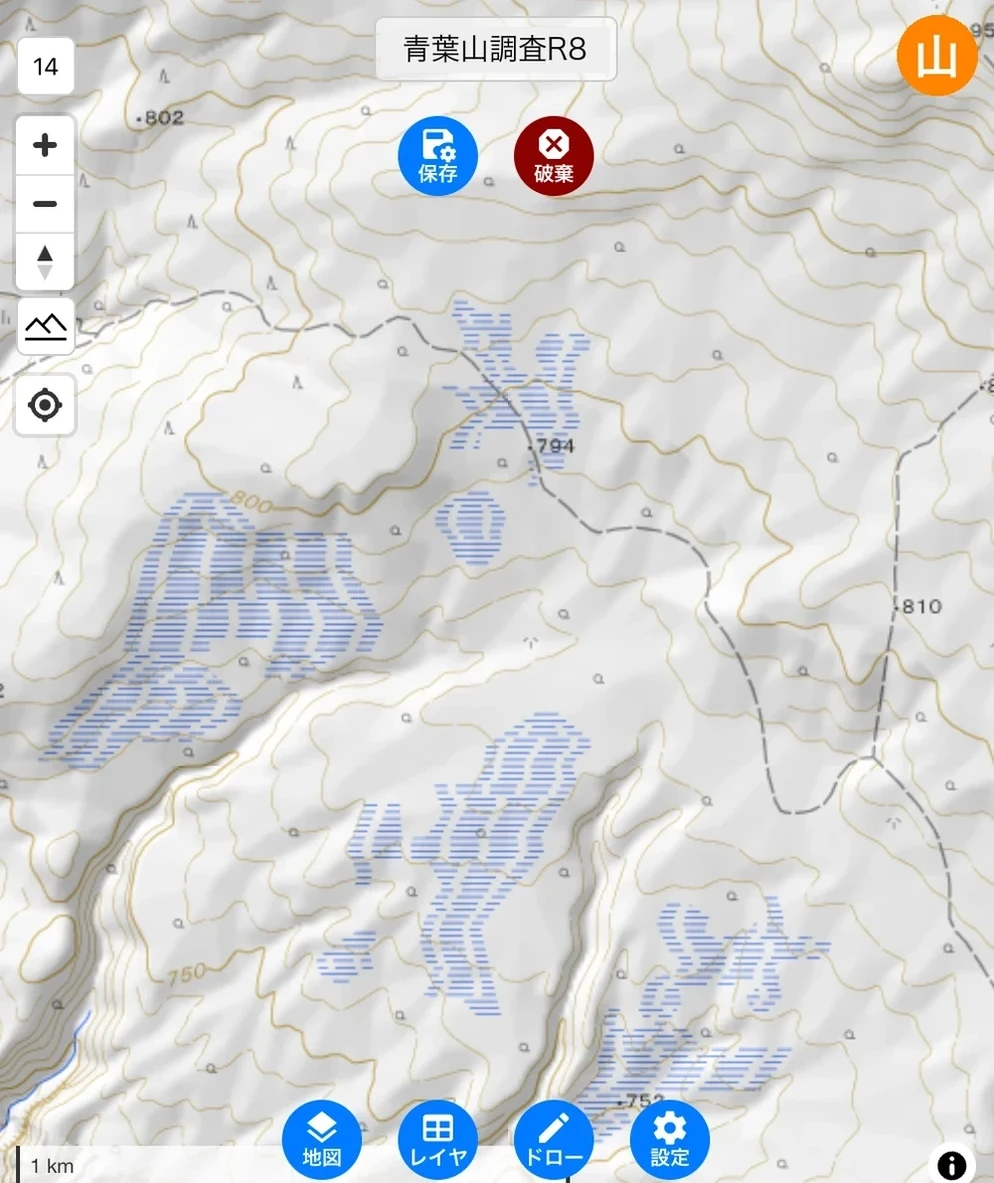
Enter project settings mode with “Settings” in the project settings, then prepare the base maps, survey forms (layers), and data such as survey sites on the Home screen. Survey sites and past results can be brought in with Import Data.
The project name and the “Save” / “Discard” buttons appear at the top. Confirm with “Save” once everything is ready (“Discard” cancels the changes made in this mode). What you set up here is exactly what members see when they open the project.
Layer sharing
“Sharing” (Private only / Shared with members / Project common) on the Layer settings screen decides who sees the layer. Choose it to match what the layer is for.
- Private only — For your own records. Only you can view and edit them.
- Shared with members — For records you want to share with the other members during the survey. All members can view them; only you can edit them.
- Project common — For data everyone should see in the same form, such as the survey area or past results. It is read-only for members, so the add and delete buttons in the data list are disabled; owners and admins edit it in project settings mode.
In the field (members)
⑤ Sign in and open the project
Members sign in with their organization account from the account button at the top right of the Home screen on their phone, exactly as in ①. Once signed in, open the project like this:
- Open the project list from “Projects” in the account menu.
- Tap the row of the project you are joining.
- Choose “Open” to download the project data and return to the Home screen.
If the project is not in the list, use “Reload” to fetch it from the cloud again.
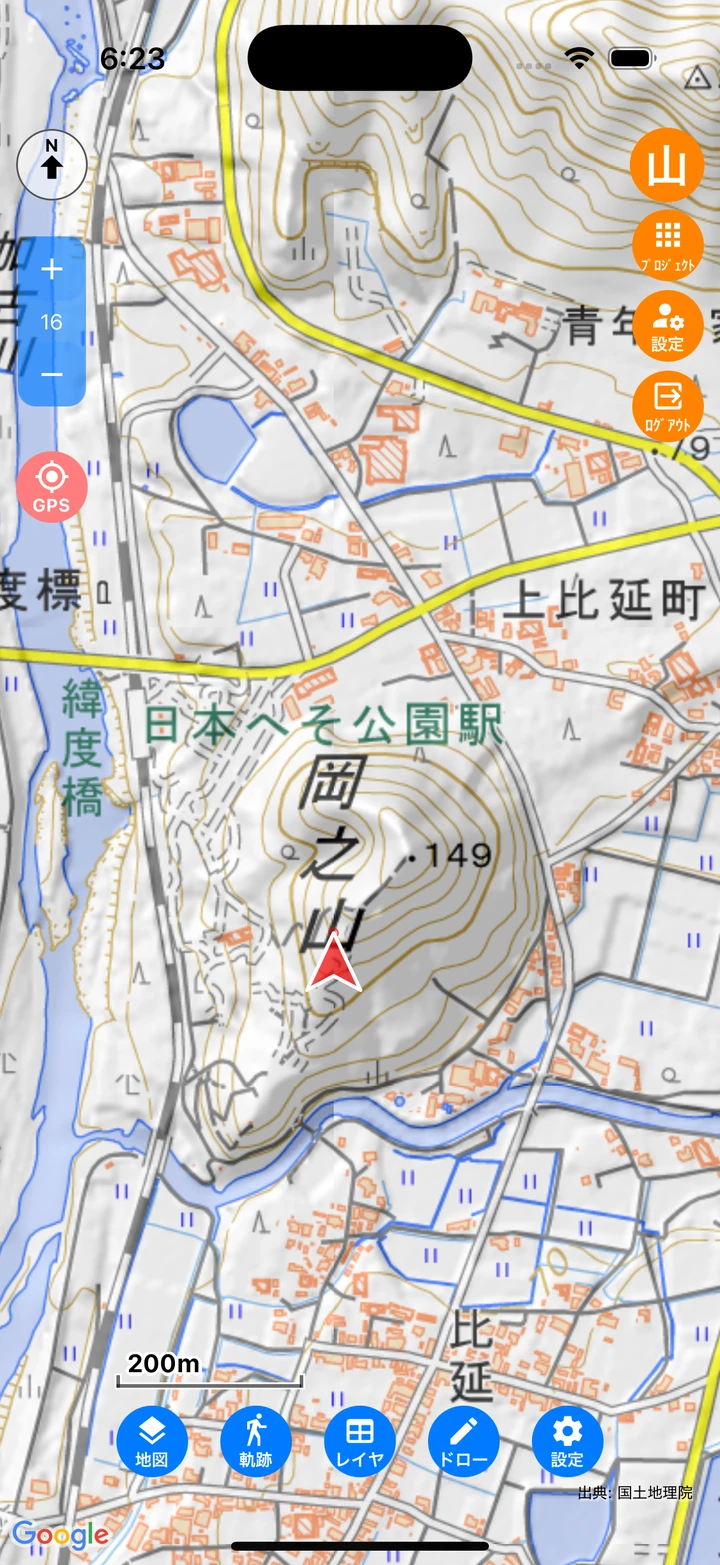
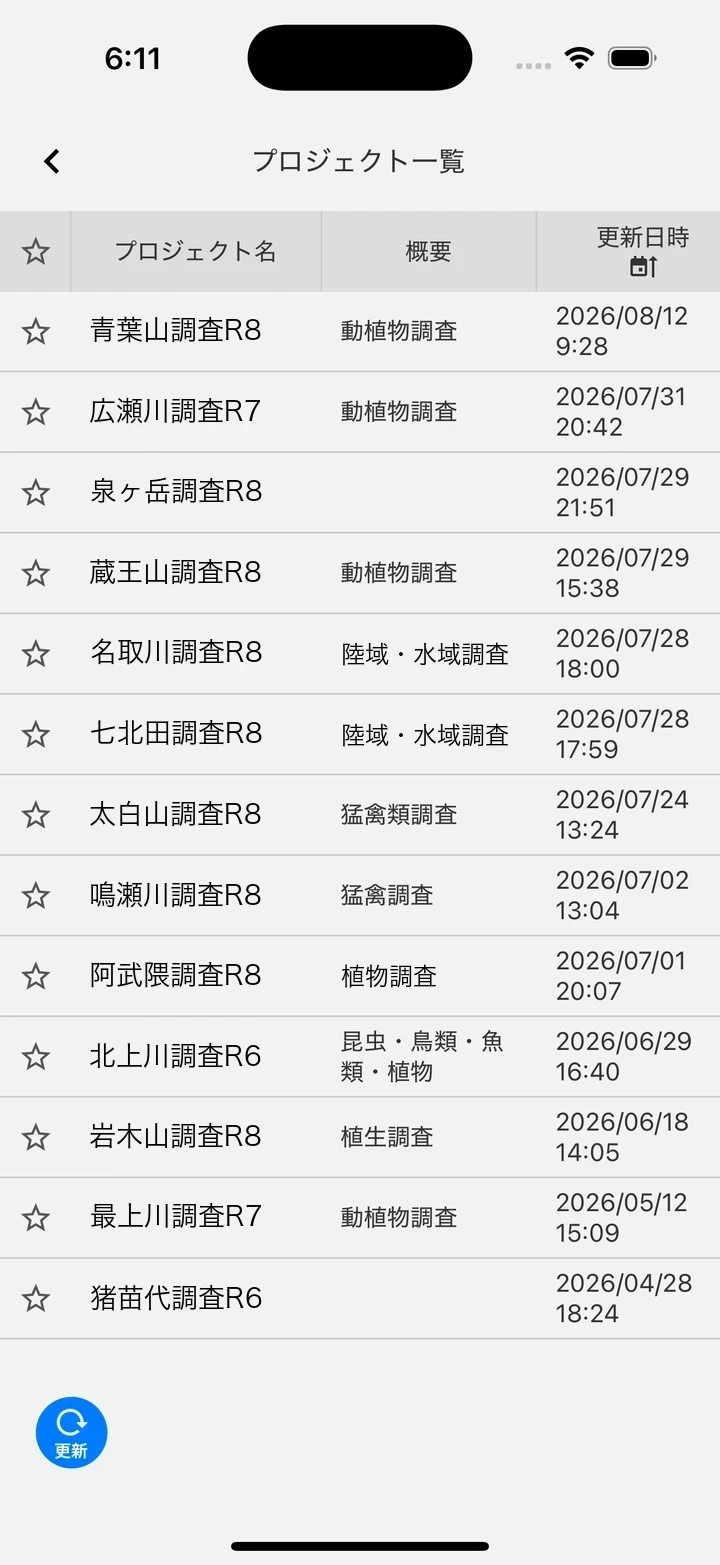
⑥ Record in the field
Recording works exactly as usual (see Record Data and Draw Points, Lines & Polygons). You use the survey forms the admin prepared, so there is nothing to line up beforehand.
You can record with no signal, too. Uploading can wait, so in the field you can concentrate on recording.
⑦ Upload what you recorded
While a project is open, tapping the project label (top center) shows the operation buttons, and you exchange what you recorded with them.
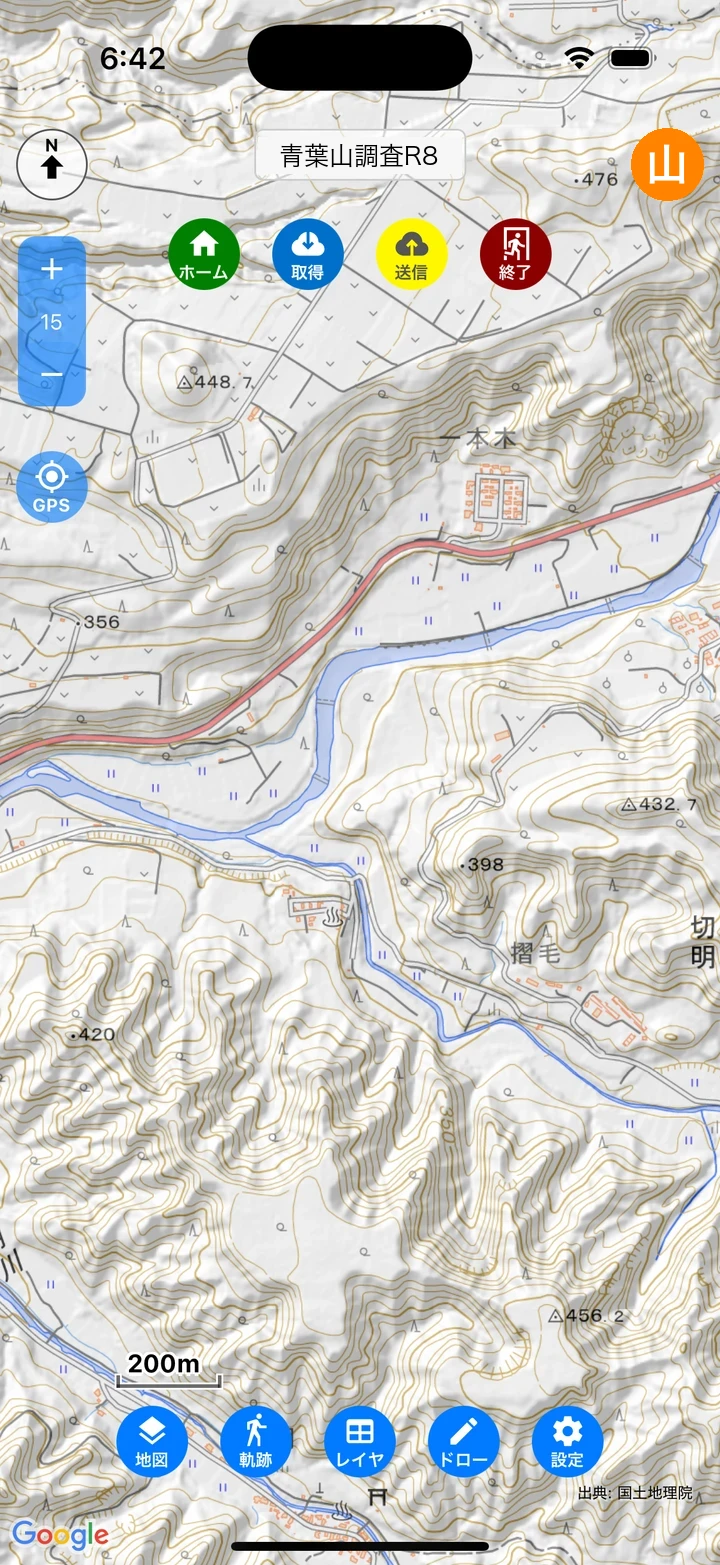
- Home — Jumps the map to the project’s extent, so you can see where the survey area is right away.
- Upload — Uploads your data to the cloud. Once uploaded, the rest of the team can get it with “Download”.
- Download — Downloads the latest data from the cloud, including other members’ records.
- End — Closes the project. As warned by “Any data that has not been uploaded will be discarded!!”, send any data you need first. An automatic backup is created on the device just before closing (see App Settings).
Using the data (owner/admin)
⑧ Fetch everyone’s data to review it
Open the project settings screen in the web version and choose “DL” at the bottom. All of the project’s data and settings, including every member’s records, are exported to a file.
Organization-only features
These are available only while you are signed in with an organization account.
Field-notebook layer presets
When you create a layer, pick a ready-made survey layer for the type of survey. The fields and dictionaries come with it, so the whole team uses the same survey form (see Create Survey Forms).
Flight map
A tool for recording raptor flights. Setting a line layer’s purpose to “Flight map” shows a dedicated tool palette (the “Raptor field notebook (flight)” preset comes preconfigured). Use the buttons from top to bottom, following the recording steps.
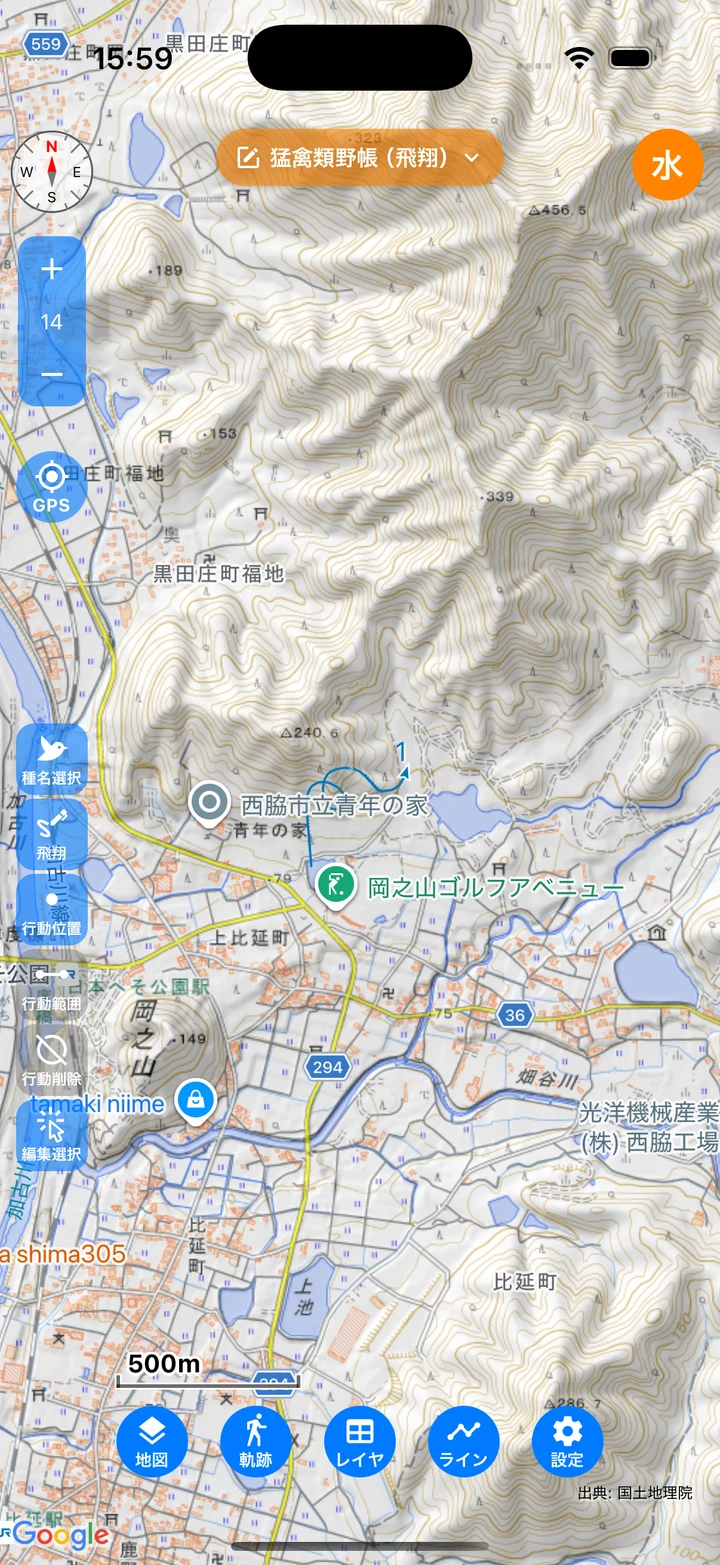
- Species — Choose the species, sex, and age before drawing. The chosen attributes are recorded on both the flight line and its behavior symbols, and the line is drawn in the color of the species.
- Flight — Trace the individual’s flight path by hand. One line is one observation; save it with “confirm”.
- Behavior point — Records “perched”, “hunting”, “hovering”, “mating”, or “call only” at a single point. When a flight line is present, the point can only be placed where you tap on that line. When there is no flight line (for example when recording only a perch or a call), it can be placed anywhere on its own.
- Behavior range — Traces symbols such as circling, soaring, stooping, display, chasing off, foraging, carrying prey, and carrying nest material along the line being drawn.
- Erase behavior — Erases only the behavior symbols attached to the line (the flight line itself is kept).
Placing a symbol also fills in the corresponding attribute field, and the symbols follow along when you modify the line’s shape. Symbols keep the same size regardless of the map’s zoom level.
Tapping a behavior symbol attached to a line selects the flight line rather than the symbol. To change a behavior, erase it with “Erase behavior” and place it again.
Not covered here
The following are not described in this chapter yet; we will add them as the service becomes available.
- Account settings
- Encryption and security
- Roles and member management
- Cloud data management
- Archiving projects
- Deleting a project
- Data templates
- Resolving data conflicts
- What is unavailable while a project is open